Install
From zero to a running node in one command
Docker Compose is the recommended install: one command starts the control plane, embedded agent and PostgreSQL. The script install remains available for hosts managed by systemd.
curl -fsSL https://raw.githubusercontent.com/shuaiZend/PingWAF/main/deploy/compose/install.sh | bashCommand builder
Compose your install command
Docker Compose is pre-selected — one command, database included. Fields are pre-filled with the documented defaults; change only what you need. Script install remains on the second tab.
Docker Compose
Deploy with Docker Compose
Docker Compose is the recommended path: one command starts the control plane, its embedded agent and PostgreSQL, with data and certificates in named volumes. Upgrades only change the image tag.
- Docker Engine 24+ with the Compose v2 plugin (docker compose, not the legacy docker-compose binary).
- Ports 80, 443, 9080 and 9090 free on the host — or override them in the fields below.
- No external database needed: the compose file ships its own PostgreSQL 16 container with named volumes.
- The dashboard serves HTTPS with a self-signed certificate on first boot. Upload a real one under Settings → Control plane HTTPS, or set TLS_ENABLED=false for plain HTTP.
curl -fsSL https://raw.githubusercontent.com/shuaiZend/PingWAF/main/deploy/compose/install.sh | bash
Run it in an empty directory: the installer downloads docker-compose.yml, writes a private .env, pulls the image and starts the stack. An existing .env is never overwritten — re-run the same command to upgrade.
- 1
Run the one-liner
Run the command above in an empty directory. The installer creates ./pingwaf, downloads the compose file and writes a private .env.
- 2
Wait for the stack
Compose pulls the image, starts PostgreSQL, waits for its health check and then starts PingWAF. The first boot takes a minute or two.
- 3
Sign in
Open https://<host>:9080 and use ADMIN_EMAIL / ADMIN_PASSWORD (the default password must be changed at first sign-in). Then add a site.
Need to customise? Generate a command with flags
Only change what you need; the command appends flags that differ from the defaults. The administrator password is never written into the command — the console forces a change at first sign-in.
curl -fsSL https://raw.githubusercontent.com/shuaiZend/PingWAF/main/deploy/compose/install.sh | bash
First login: https://<your-host>:9080 with the ADMIN_EMAIL / ADMIN_PASSWORD above (accept the self-signed certificate warning until you upload a real one). Agents reach the control plane on :9090.
Upgrading
Pulls the image for the tag in your .env and recreates the container with the same volumes — configuration, data and certificates survive the restart. Pin the tag when you want controlled upgrades.
docker compose pull && docker compose up -d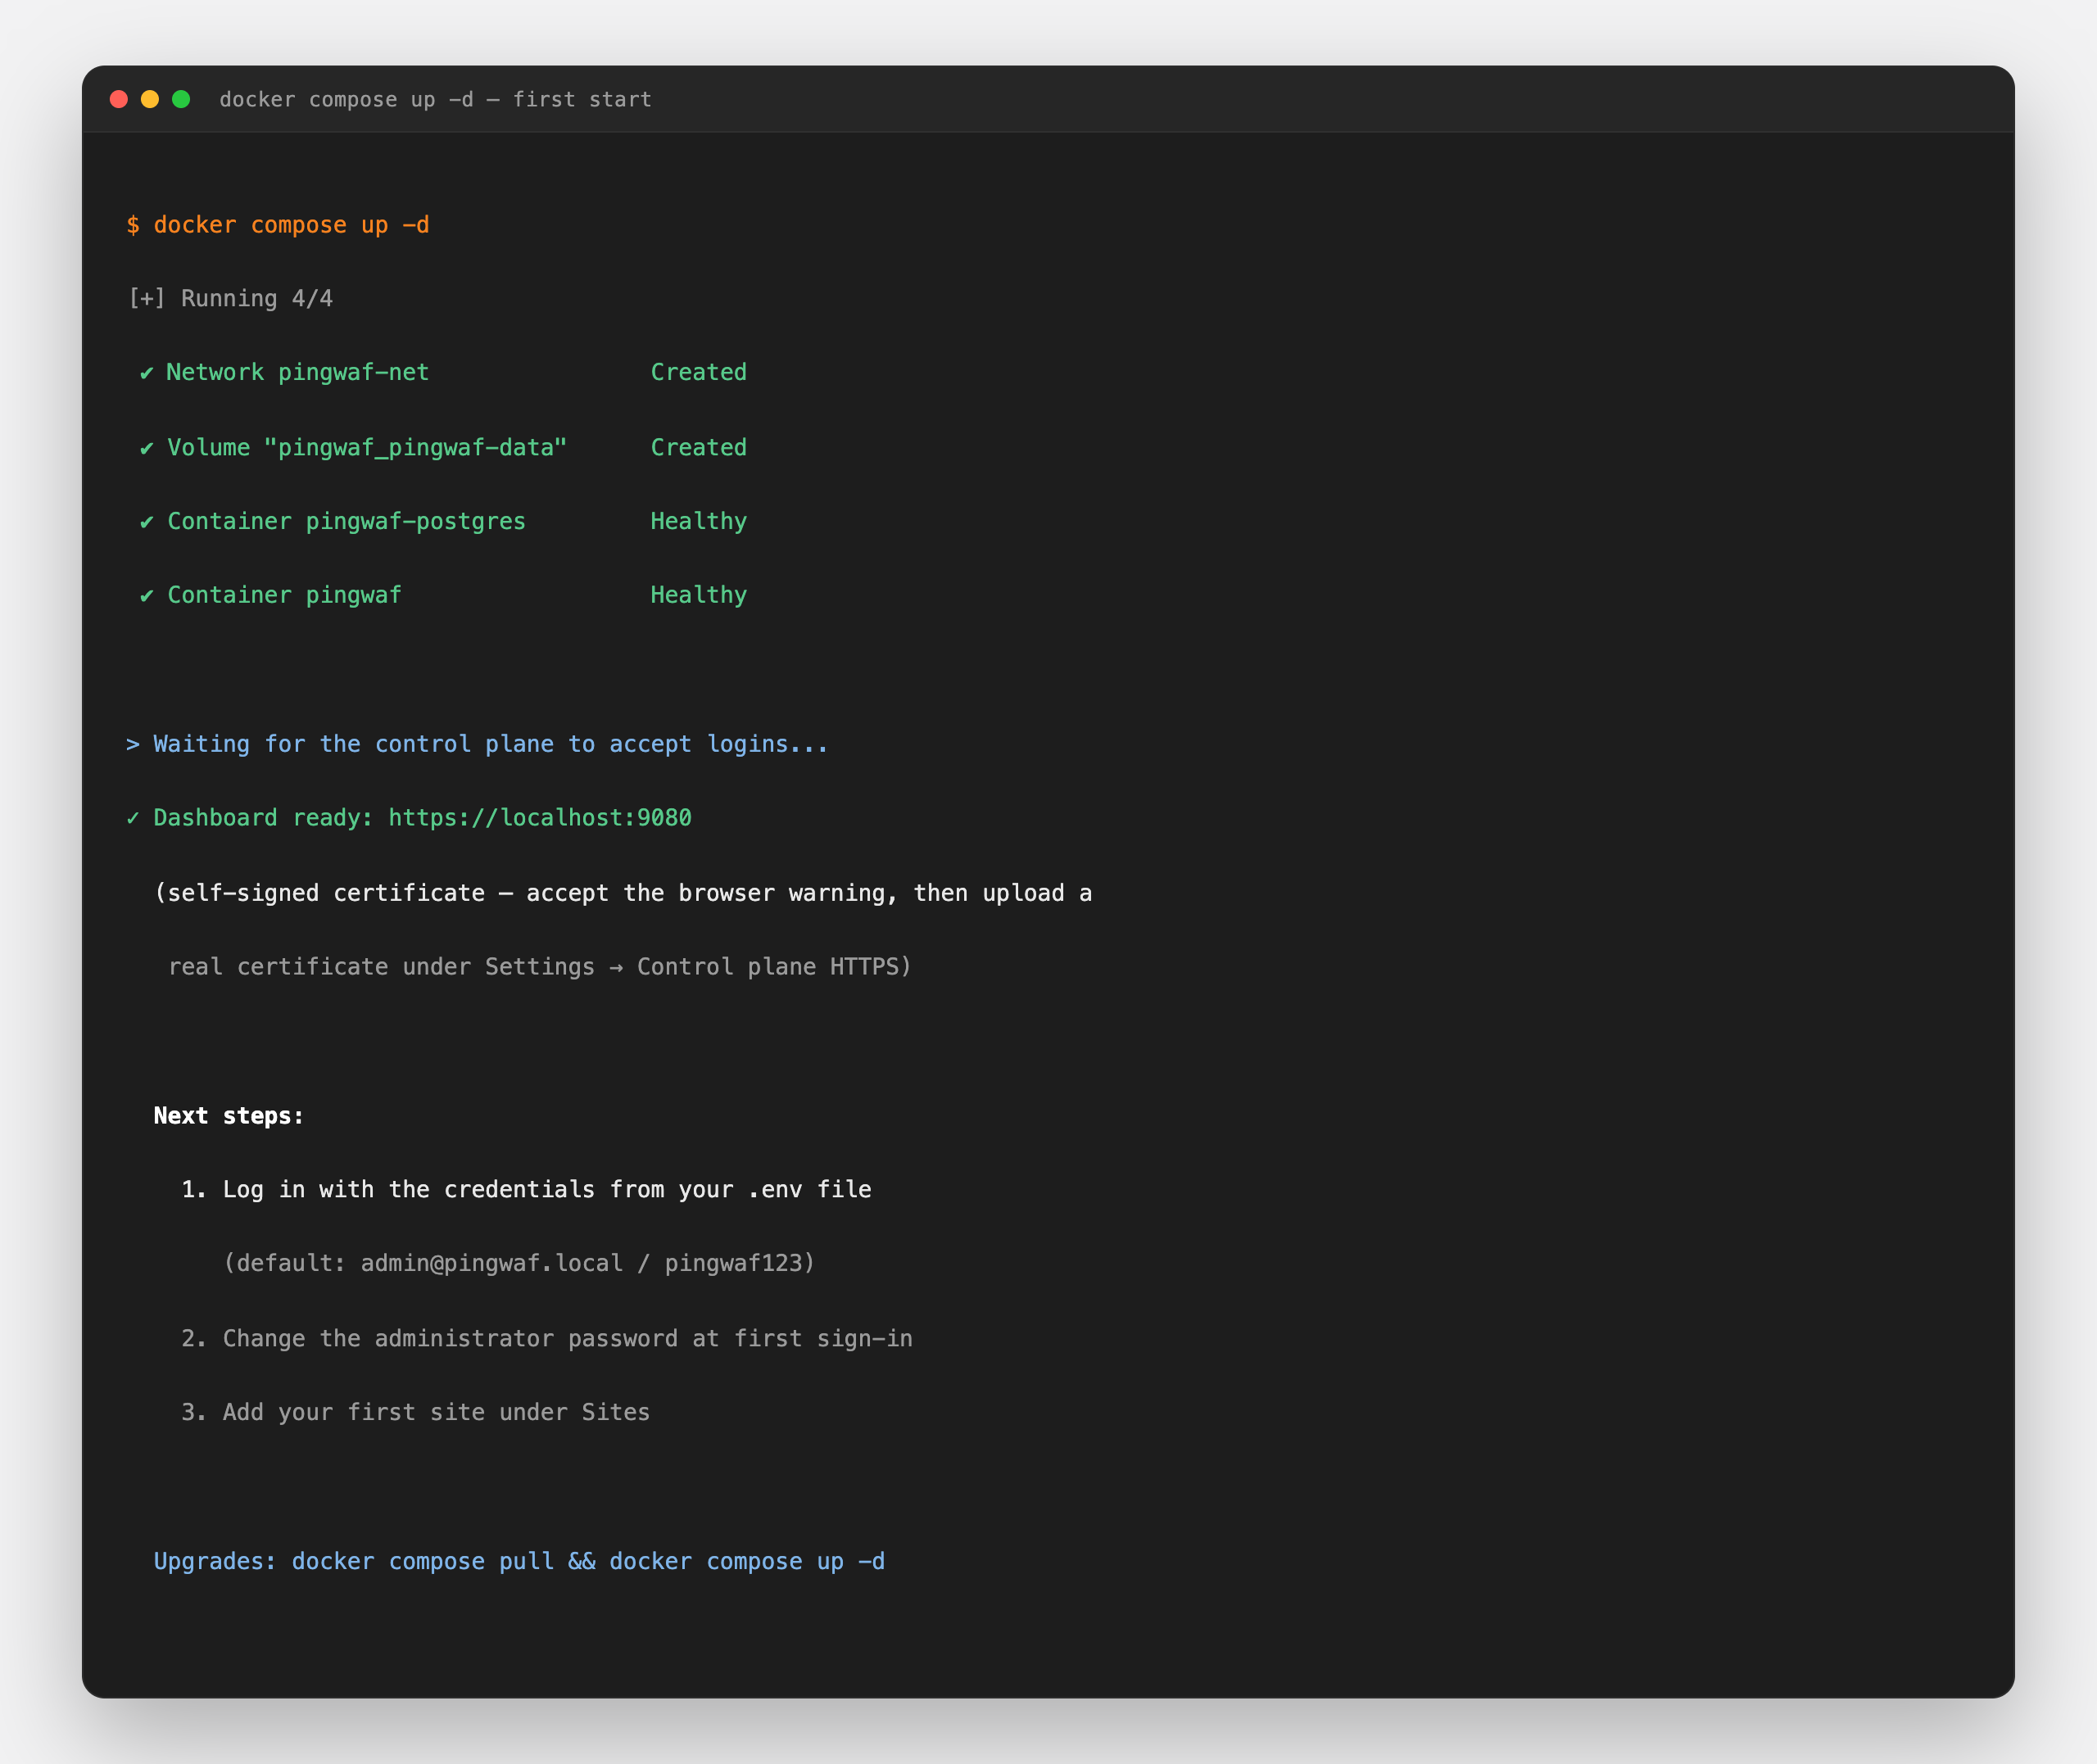
Pre-filled with the installer defaults — only values you change are added to the command.
curl -fsSL https://raw.githubusercontent.com/shuaiZend/PingWAF/main/deploy/compose/install.sh | bash
The API key appears in plain text in the command and may end up in your shell history. Prefer exporting PINGWAF_API_KEY instead, or run the installer interactively and paste the key when asked.
Only values that differ from the defaults are appended as flags, so the untouched builder produces the shortest one-liner. Arguments reach the piped script through bash -s --.
Interactive setup
Or let the installer ask
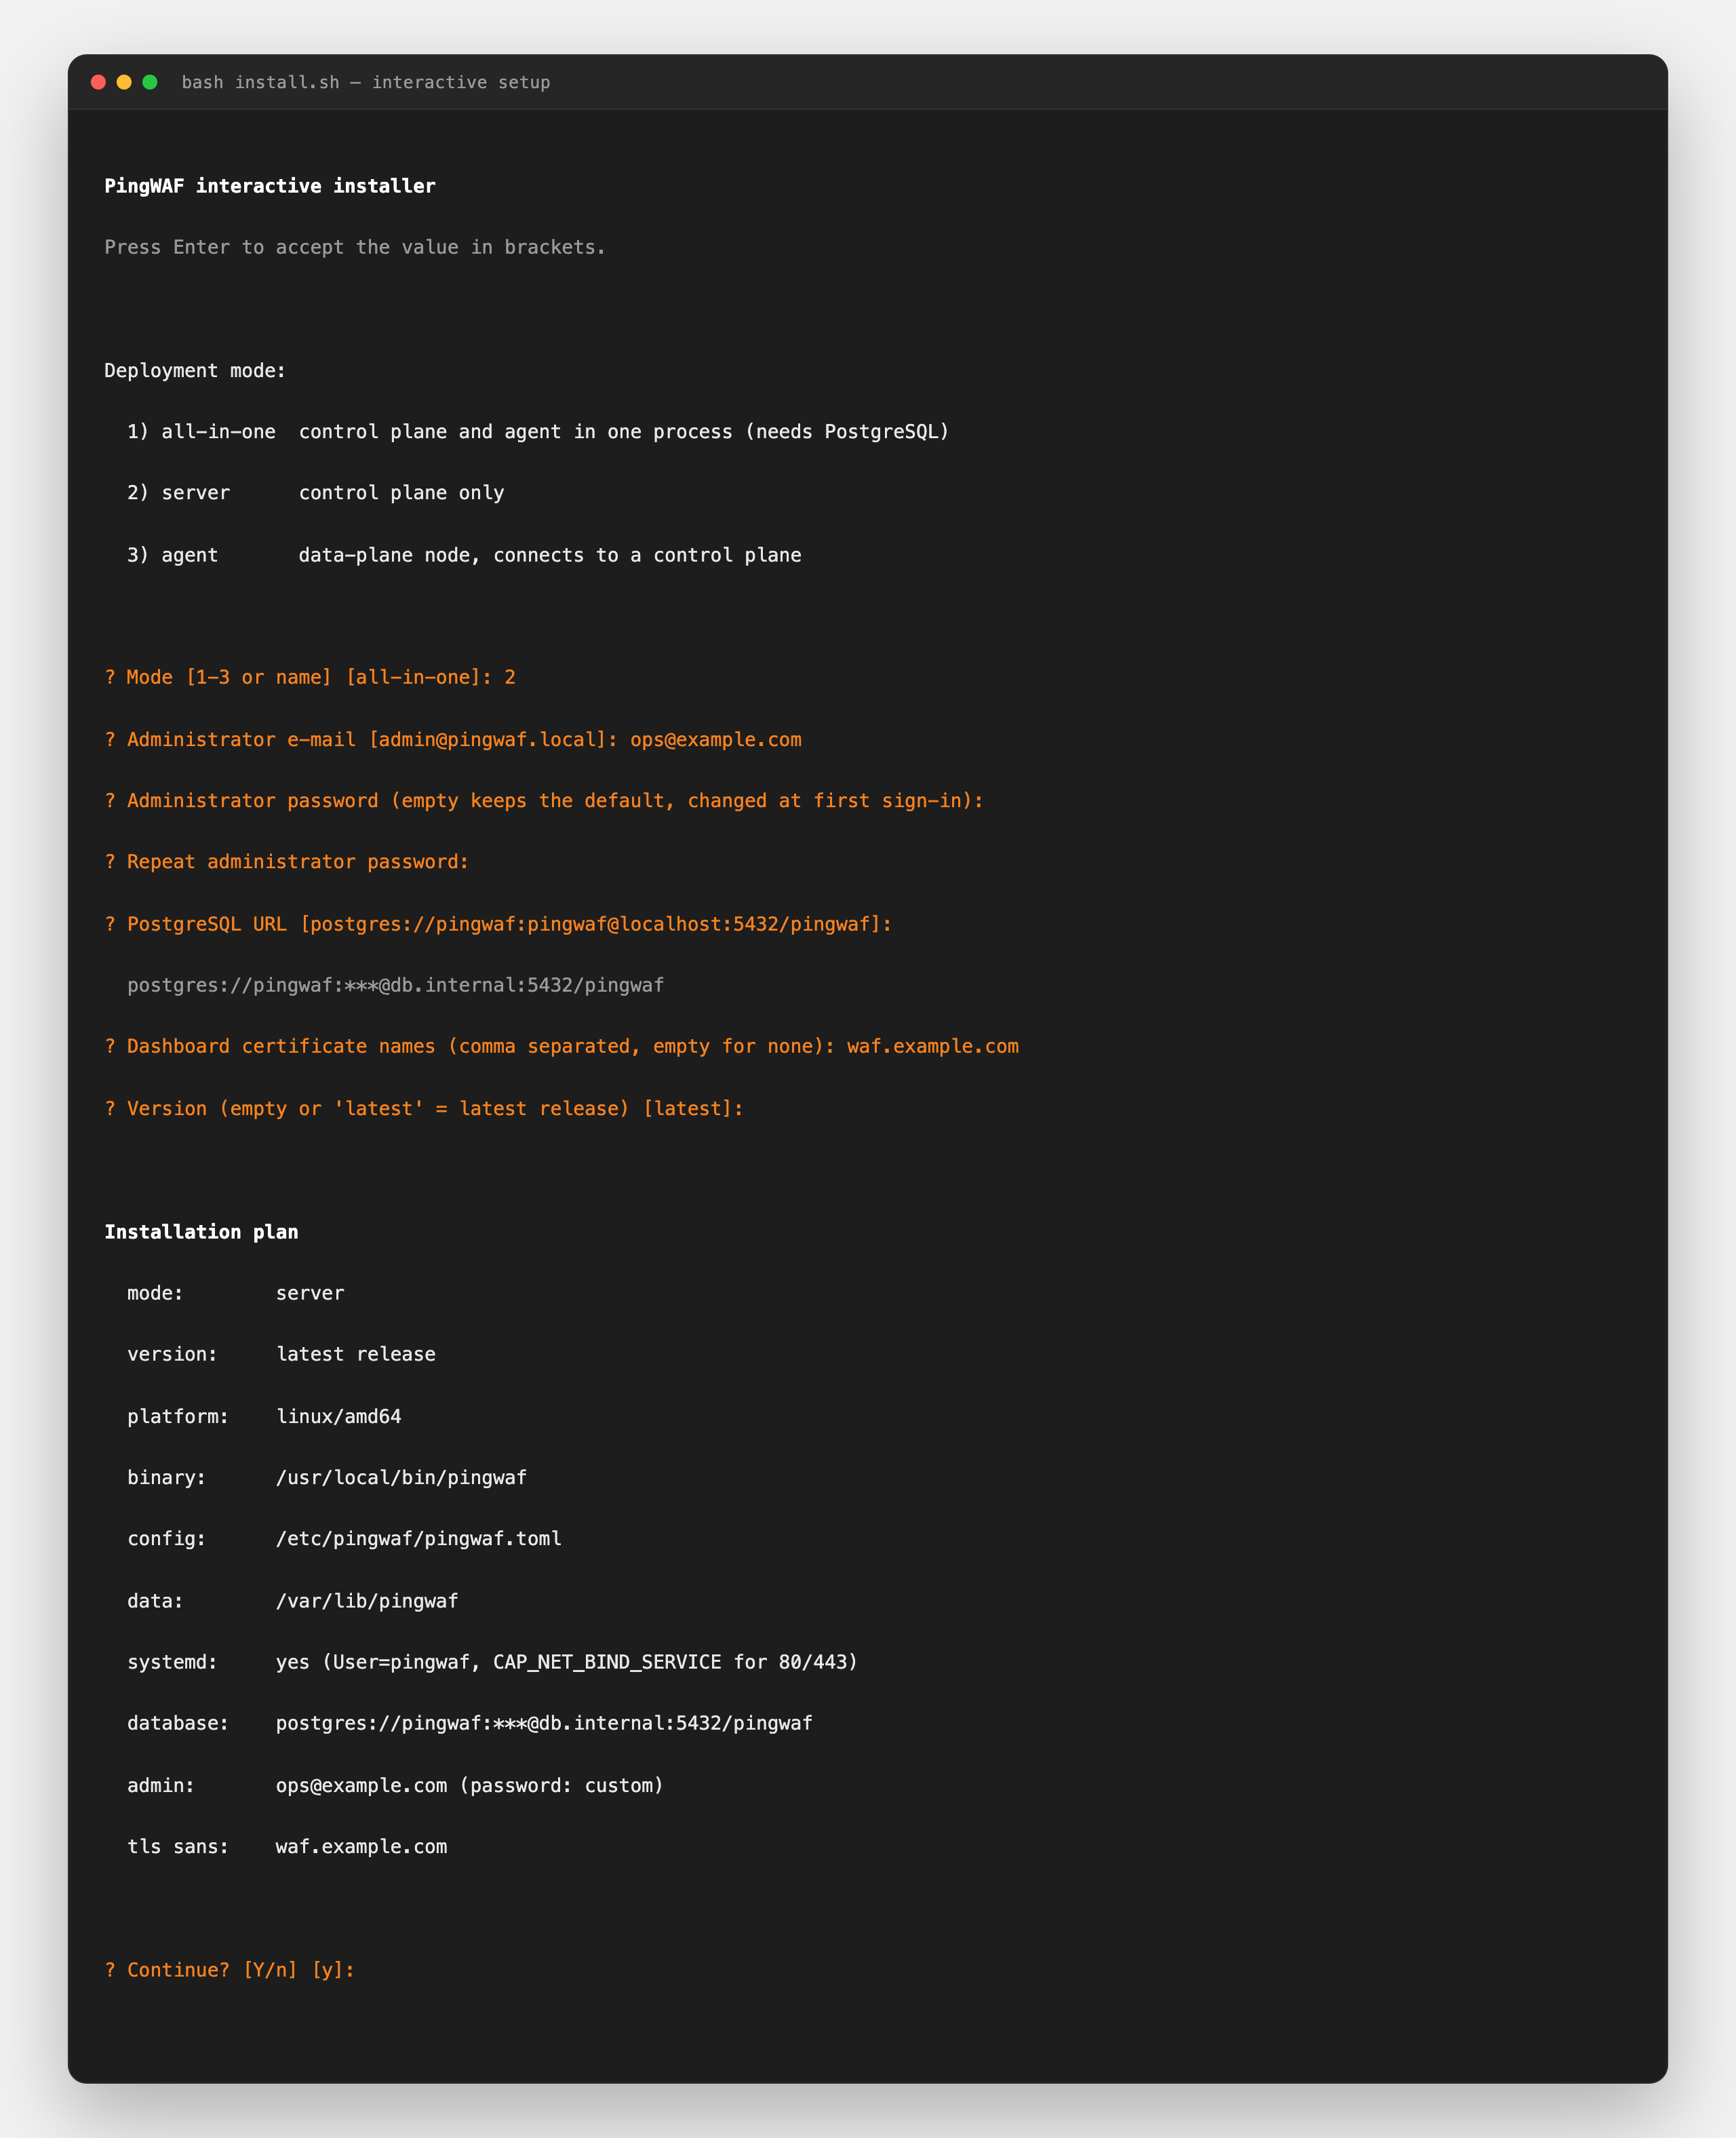
Run the script from a terminal without flags and it walks through mode, credentials, database and certificate names, then prints the resolved plan for confirmation.
-
Choose the deployment mode
1 all-in-one, 2 server or 3 agent — press Enter to accept the bracketed default.
-
Fill in the parameters
Agents ask for the control plane URL and enrollment key; server modes ask for the administrator account, PostgreSQL URL and certificate names. Secrets stay hidden while typed.
-
Confirm the summary
Before anything is written, the installer prints the resolved plan — mode, version, platform, paths, systemd state and a masked database URL.
-
Finish and verify
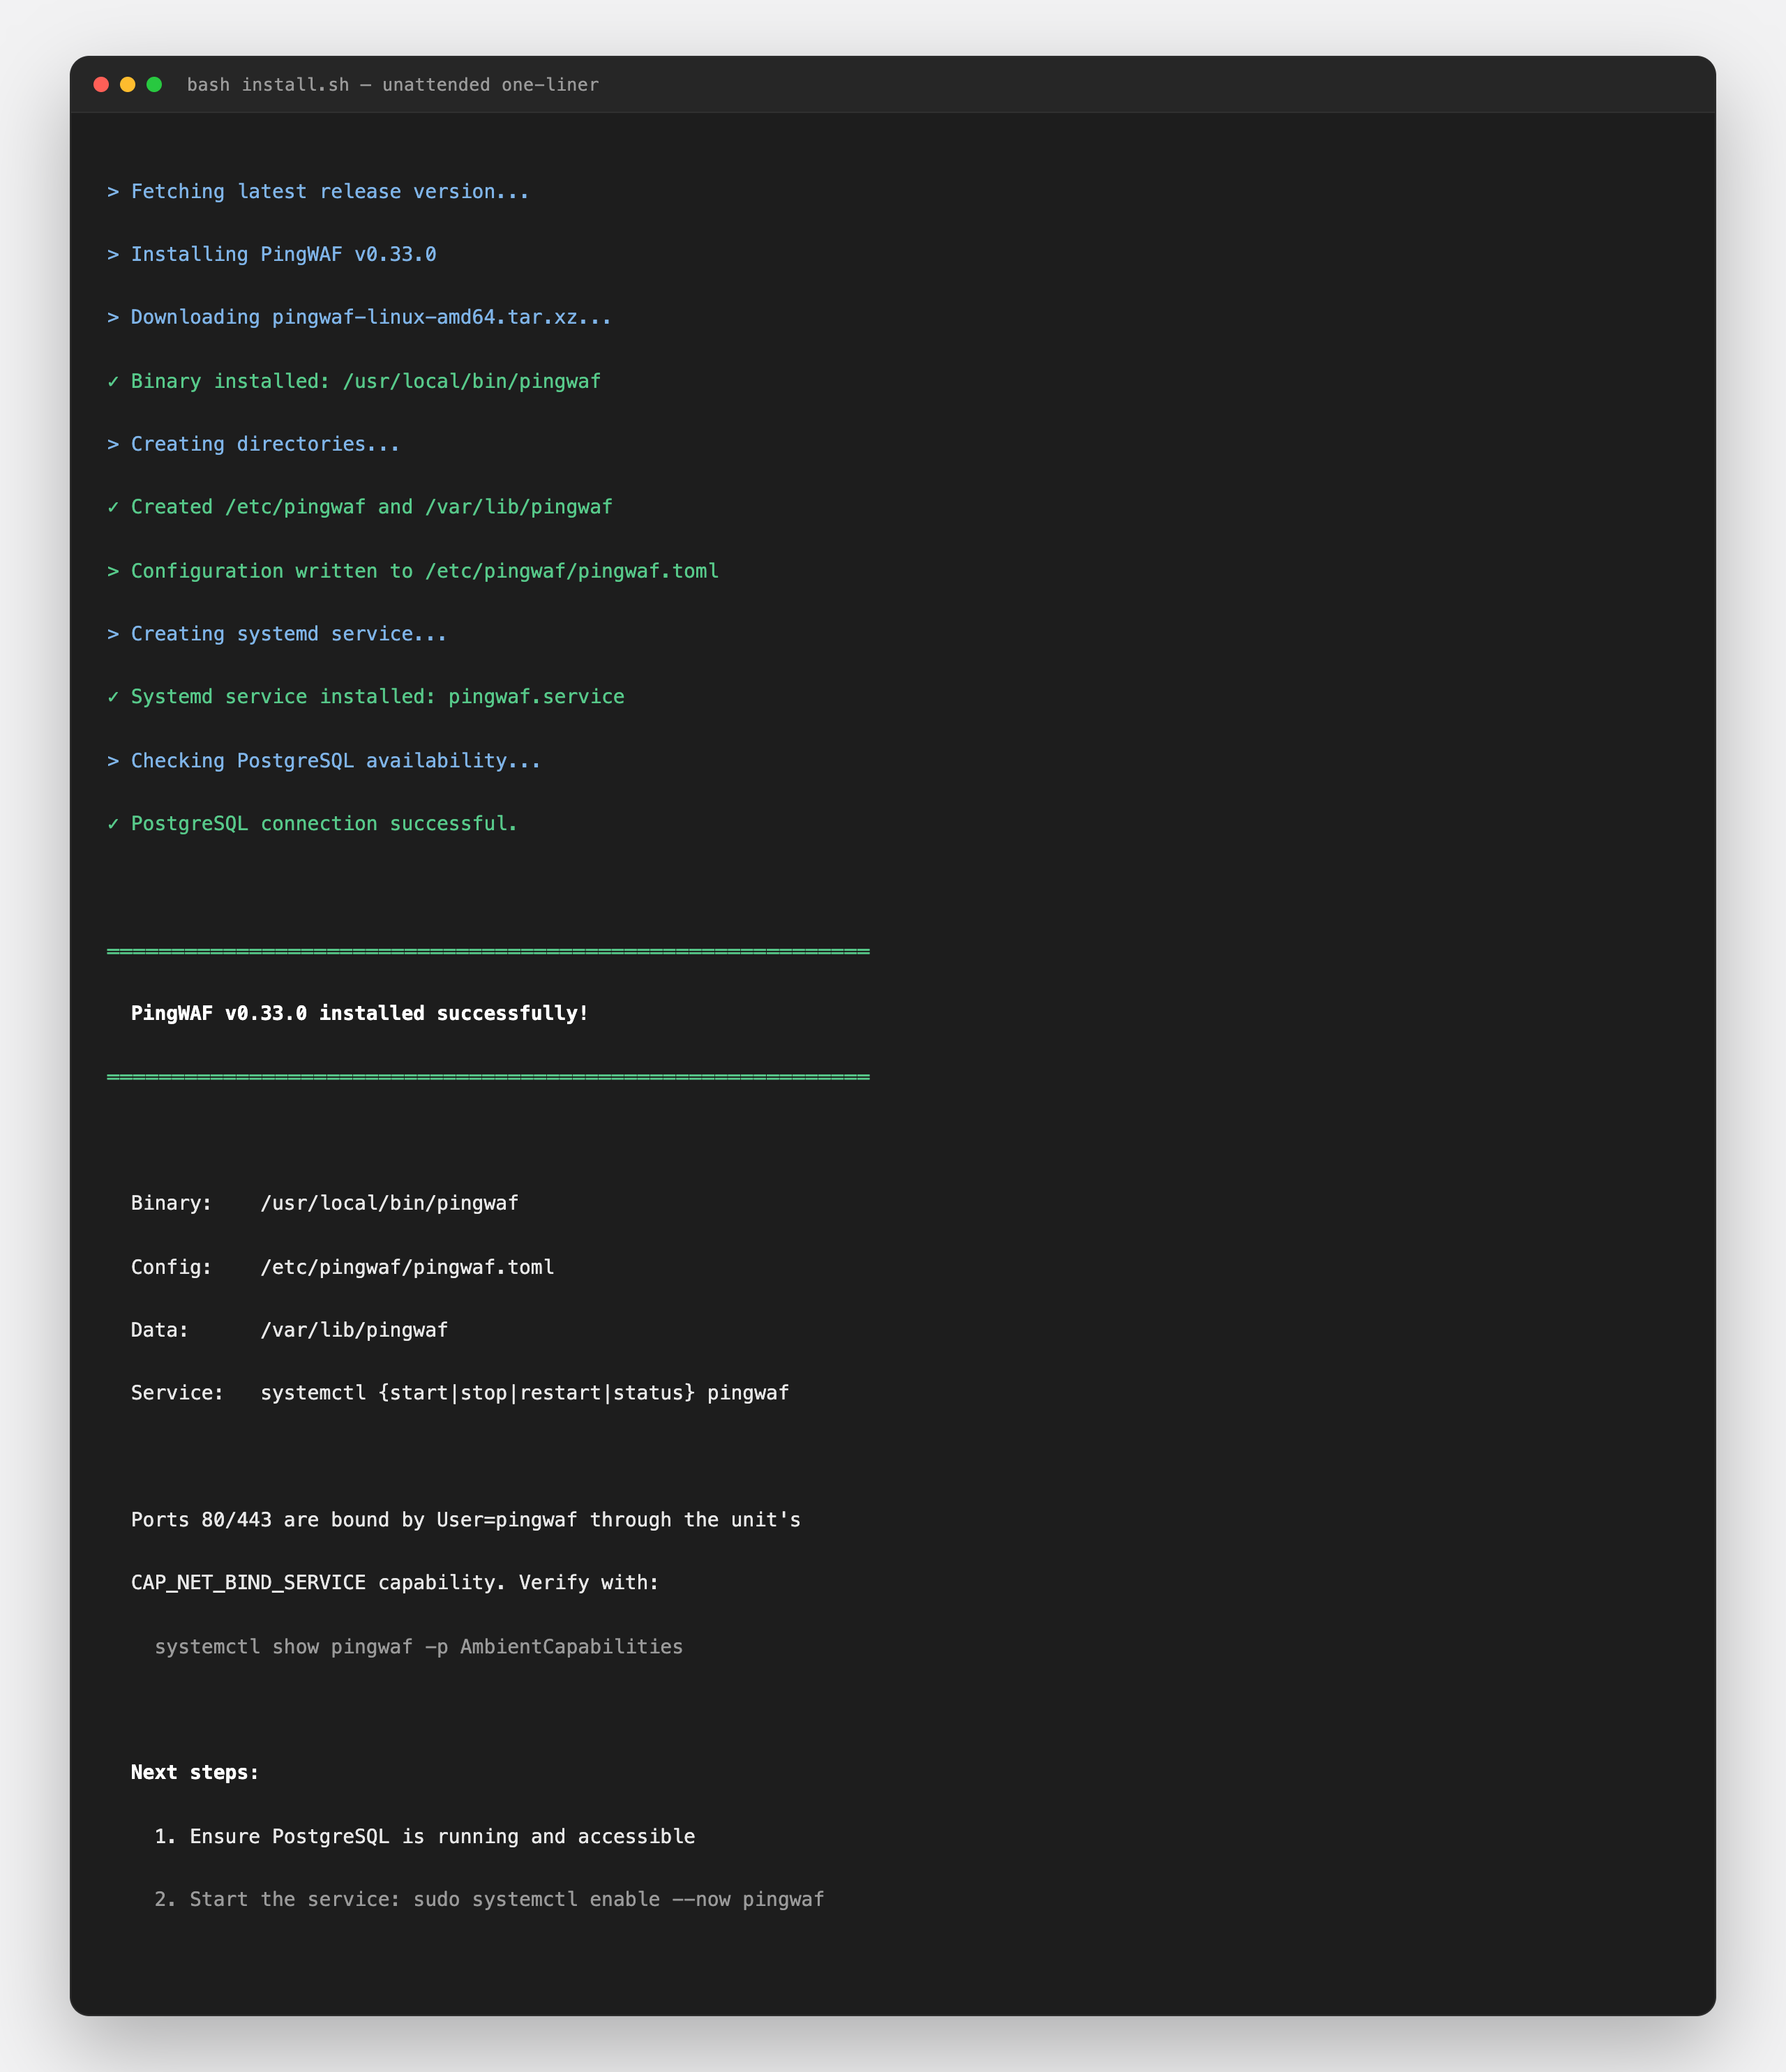
Server modes print the start command; agents are enabled and started automatically. Confirm the node under Nodes in the dashboard.
Flag reference
Installer flags at a glance
Every flag install.sh accepts. Each one also has a PINGWAF_* environment variable equivalent.
--mode Operating mode: all-in-one, server or agent. Defaults to all-in-one.
--version Install a specific release (a leading v is stripped). Empty or 'latest' resolves the newest GitHub release.
--db-url PostgreSQL connection string for server/all-in-one. Defaults to postgres://pingwaf:pingwaf@localhost:5432/pingwaf.
--server-url Control plane gRPC URL for agent mode. Use https:// — gRPC TLS is served by default.
--api-key Agent enrollment token. Can also be supplied as PINGWAF_API_KEY to keep it off the command line.
--admin-email Seeded administrator e-mail (server/all-in-one). Defaults to admin@pingwaf.local.
--admin-password Seeded administrator password (server/all-in-one). Empty keeps pingwaf123, which the console forces you to change at first sign-in.
--tls-sans Comma-separated hostnames the generated dashboard certificate should cover.
--no-systemd Skip creating the systemd unit — for containers, upgrades or hand-rolled process managers.
--interactive / --non-interactive Force prompting even when flags are given, or never prompt and use the given values plus defaults. Piping without flags stays non-interactive.
--dry-run Print the resolved plan — mode, version, platform, paths — and exit without installing.
Troubleshooting
When the install does not come up clean
The five failures seen most often in support, and the command that pinpoints each one.
The installer cannot reach PostgreSQL
all-in-one and server modes need PostgreSQL 14+ before first boot. The script warns when psql cannot connect — install the server, create the pingwaf user and database (createuser / createdb), then re-run the installer or edit /etc/pingwaf/pingwaf.toml and run systemctl restart pingwaf.
bind() failed on 0.0.0.0:80 or :443
The data plane binds 80/443 as the unprivileged pingwaf user, which only works because the unit grants CAP_NET_BIND_SERVICE. If binding still fails, check systemctl show pingwaf -p AmbientCapabilities and add the capability with a drop-in: sudo systemctl edit pingwaf → [Service] AmbientCapabilities=CAP_NET_BIND_SERVICE. Units written before the capability was granted keep failing until the drop-in is added.
The binary fails with a versioned glibc symbol error
Release assets are built on Ubuntu 24.04 and need glibc 2.39 or newer. On older distributions (Debian 11, Ubuntu 20.04, CentOS/RHEL, Alpine, …) the installer's smoke test stops with a clear message — build from source instead.
The systemd service will not start
Inspect the unit log with journalctl -u pingwaf -e and review /etc/pingwaf/pingwaf.toml. There is no reload: apply any edit with systemctl restart pingwaf and check systemctl status pingwaf afterwards.
Container startup fails with "bind() failed on 0.0.0.0:443" / Permission denied
The image already grants CAP_NET_BIND_SERVICE to the binary at build time, so the unprivileged pingwaf user can bind 80/443 in bridge mode with plain docker run or docker compose up -d. If it still fails, the runtime stripped file capabilities — add --cap-add=NET_BIND_SERVICE (the bundled compose file already sets cap_add), or switch to host networking with network_mode: host (then comment out ports: and networks:; 9080/9090 will listen on the host directly). Verify with docker exec pingwaf getcap /usr/local/bin/pingwaf (expect cap_net_bind_service=ep) and docker exec pingwaf id -u (non-zero). Full details: https://github.com/shuaiZend/PingWAF/blob/main/docs/deployment.md#binding-ports-80443-in-containers
Installed? Now add your first site.
The docs cover the site model, distributed topologies, configuration precedence and the full environment variable reference.